
To get rid of “digging up dirt” in your ear — which I interpret as the buildup of dirt, earwax, or any other debris — it’s important to approach ear cleaning with care. Cleaning ears improperly can lead to injury, infection, or even worse, pushing dirt and wax further inside. Here’s a thorough guide with detailed steps on how to maintain ear hygiene and safely deal with buildup:
1. Avoid Using Cotton Swabs

- Why: Cotton swabs can push dirt and earwax deeper into the ear canal, potentially causing blockages or damage to the eardrum.
- Detailed Tip: Instead of swabs, use a washcloth or soft towel to clean the outer ear. If you have wax buildup inside the ear canal, avoid inserting anything into your ear to prevent pushing the wax deeper.
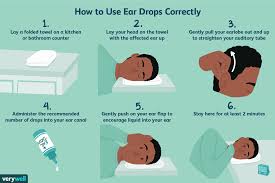
2. Use Over-the-Counter Ear Drops
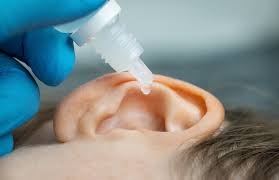
- Why: Ear drops soften the earwax, making it easier to remove naturally. They can also loosen dirt or debris that may have collected in the ear.
- How to Use:
- Purchase over-the-counter ear drops, mineral oil, or baby oil.
- Lie on your side with the ear you wish to treat facing upward.
- Drop the recommended amount of ear drops into the ear.
- Keep your head tilted for 5-10 minutes to allow the drops to work.
- Gently wipe away any excess after draining.
- Repeat this once a day for 3-5 days, depending on how much buildup you have.
3. Hydrogen Peroxide Solution for Softening Earwax
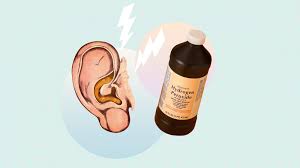
- Why: Hydrogen peroxide helps dissolve earwax and debris by oxygenating the ear canal.
- How to Use:
- Mix equal parts of hydrogen peroxide (3%) and warm water (ensure the water isn’t too hot or cold).
- Lie on your side with the affected ear facing up.
- Using a dropper, place 5-10 drops of the solution into your ear.
- Let it sit for about 5-10 minutes. You may hear bubbling or fizzing, which is the solution breaking down the wax.
- After the time has passed, tilt your head to let the solution drain out.
- Use a soft cloth to wipe away any residue.
4. Gentle Ear Irrigation
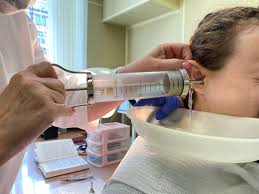
- Why: Ear irrigation helps flush out earwax, dirt, and other debris in a safe, controlled manner.
- How to Use:
- Use a sterile ear irrigation kit that includes a bulb syringe.
- Fill the syringe with warm (not hot or cold) saline solution or water.
- Lean your head over a sink or towel to catch the water.
- Gently squirt the water into the ear canal, aiming toward the side of the ear canal to avoid damaging the eardrum.
- Let the water sit for a few seconds, then tilt your head to allow it to drain out.
- Dry the outer ear with a clean towel.
- Important: Don’t irrigate your ears if you have a perforated eardrum, ear infection, or other ear issues.
5. Use a Soft Damp Cloth to Clean the Outer Ear
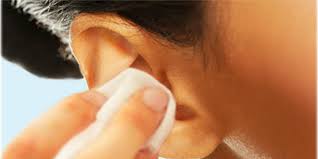
- Why: Dirt and excess oil can accumulate on the outer ear, leading to discomfort or infection.
- How to Use:
- Moisten a soft washcloth or cotton pad with warm water.
- Gently wipe the outer parts of your ear, including the earlobe and the folds, to remove any visible dirt or oil.
- Make sure you do not insert the cloth or any other object inside the ear canal.
- Dry the outer ear with a soft towel to prevent moisture buildup.
6. Ear Vacuum Devices
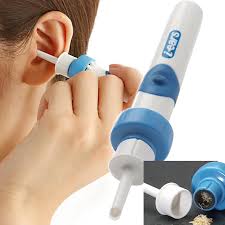
- Why: Some people prefer to use electronic ear vacuum devices to remove wax. These are safe alternatives when used properly.
- How to Use:
- Purchase an FDA-approved ear vacuum or cleaning device.
- Follow the manufacturer’s instructions carefully to avoid damaging the ear canal or eardrum.
- Gently insert the device near the ear canal (but never deep inside).
- Turn it on and let it work for a short time to vacuum up the wax or debris.
- Clean the device regularly to prevent infection.
7. Maintain Dry Ears
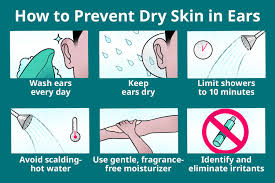
- Why: Moisture in the ear can contribute to fungal infections and wax buildup.
- How to Use:
- After swimming, showering, or bathing, dry your ears thoroughly.
- Use a clean towel to gently dab the outer ear and the area behind the ear.
- You can also tilt your head to the side to allow any trapped water to drain out naturally.
- If you feel like there’s still moisture inside, use a few drops of rubbing alcohol to dry the ear canal. It will evaporate moisture and reduce the risk of infections.
8. Professional Ear Cleaning by a Doctor
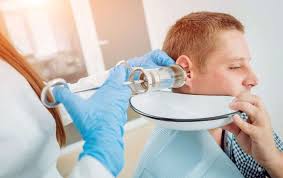
- Why: If you have persistent earwax buildup or discomfort, seeking professional help ensures a safe and effective solution.
- How It Works:
- An ENT specialist (Ear, Nose, and Throat doctor) will examine your ear and may use specialized tools like a curette or suction device to gently remove earwax or debris.
- This process is particularly important if you have impacted earwax, an ear infection, or a history of ear problems.
9. Use a Home Ear Cleaning Kit with a Curette
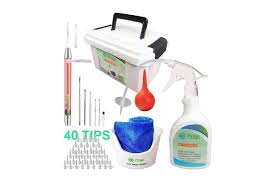
- Why: A curette is a small, looped instrument designed to remove earwax safely.
- How to Use:
- Purchase an earwax removal kit with a curette.
- Gently insert the loop end of the curette into the ear canal, being very careful not to push it in too far.
- Move the curette in a circular motion to gently scoop out the wax or debris.
- Only clean the outer part of the ear canal and avoid going deep to prevent injury.
10. Ear Protection in Dusty or Dirty Environments
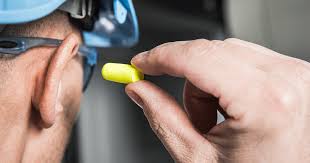
- Why: If you work in an environment with a lot of dust, dirt, or debris (such as construction or factory work), particles can enter the ear and accumulate.
- How to Use:
- Wear earplugs or earmuffs to prevent dust and debris from entering the ear.
- If you notice dirt accumulation in your ear after exposure to such environments, use a damp cloth to wipe the outer ear and follow other cleaning methods as necessary.
Extra Tips to Keep in Mind:
- Do Not Overclean: Your ears are self-cleaning, and excessive cleaning can irritate the ear canal, leading to dryness, infection, or impacted wax.
- Know When to Seek Help: If you experience pain, itching, ringing in the ears (tinnitus), or difficulty hearing, it’s time to consult a healthcare professional.
By following these steps carefully and consistently, you can ensure that your ears stay clean and healthy without the risk of harming them in the process!